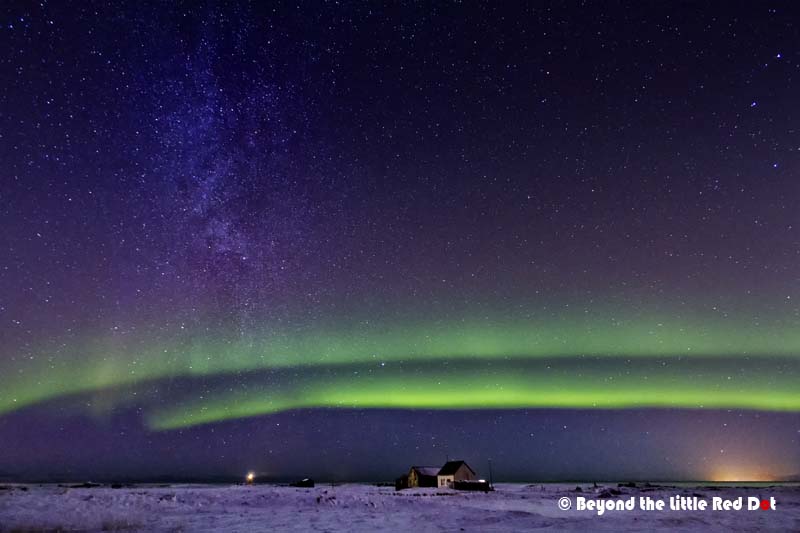
Rounding up my series of blogs on Iceland will be this one on the Northern Lights, those mystical and elusive lights in the sky which have fascinated humans for so long. I’ve always wanted to see the Northern Lights and this trip to Iceland was an opportunity of a lifetime to do it.
So what causes the Northern Lights, or Aurora Borealis as they are sometimes called? Our Sun blasts out radiation called the solar wind which consists of charged particles. The solar wind travels at immense speeds and collides with our Earth. The Earth’s magnetic field protects us from the solar wind (which will otherwise kill all life on Earth) and deflects it away from the Earth’s surface. But at the poles, the magnetic field is weaker and some of the charged particles enter the Earth’s atmosphere and collide with air molecules. These collisions emit light which we see as the Northern Lights. The Northern Lights are usually green in colour, with pink, violet and sometimes white or orange. The colours are caused by the interaction between the charged particles and the different types of gas atoms and molecules. Green and yellow come from oxygen, red, blue and violet come from nitrogen.
What to Expect?
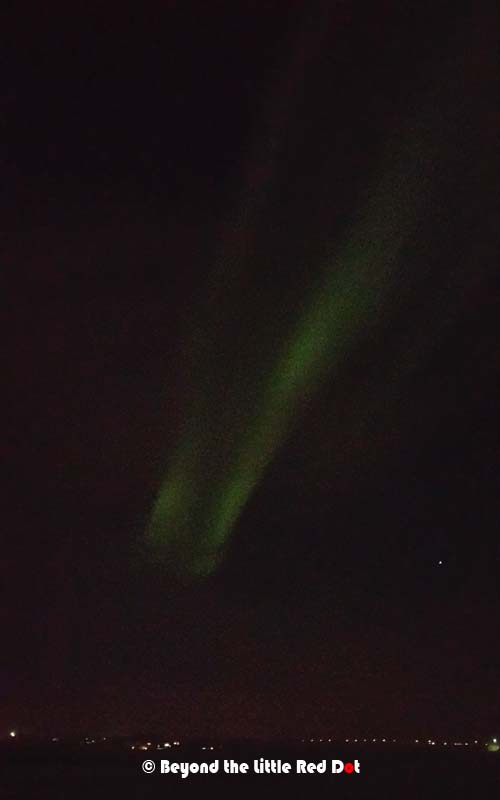
For a lot of people like us, the first time seeing the Northern Lights can be a disappointment. After watching movies where they are portrayed as dancing columns of multi-coloured light covering the whole sky, expectations are high, and we hate to think that we travelled thousands of miles to be let down. But the movies are as always, an exaggerated reflection of reality. I learned that what is shown in the movies does happen, but rarely, especially if there is high solar activity like a solar flare, and the Aurora explodes in a multi-coloured fashion show.
Where To Go
Travelling to see the Northern Lights does involve a bit of planning as they only appear near the northern and southern poles of the Earth. Going to the north is easier as there are many countries around the north pole, whereas, there is only Antarctica in the south, which almost nobody goes. Besides Iceland, you can also see the Northern Lights from Alaska, northern Canada and the Scandinavian countries (Finland, Norway, Sweden, etc), as long as the area where you are at is above or near the Artic Circle. Depending on the strength of the Northern Lights, they can also be seen further south in Scotland sometimes.
When To Go
Besides location, the best time of the year to watch them is also during winter, due to the long nights and dry air which makes the sky clearer. The Northern Lights themselves are also quite dim and you need to get out of the cities with their light pollution in order to see them clearly. As such, chasing the Northern Lights actually involves a lot of trudging out in the cold winter nights, in the middle of nowhere, and staring into the sky for hours while suffering from frostbite. Not really a fun activity for those who hate the cold and cannot do without home comforts. The Northern Lights appear throughout the year, but it’s difficult to view them in summer months due to the long daylight hours and higher humidity which results in hazy skies. In Iceland, there are also days of the Midnight Sun where the Sun doesn’t set during summer, so there are no dark nights during this time. The best times to view the Northern lights are from September to April in the northern hemisphere.

How Do I Know When the Northern Lights Will Appear?
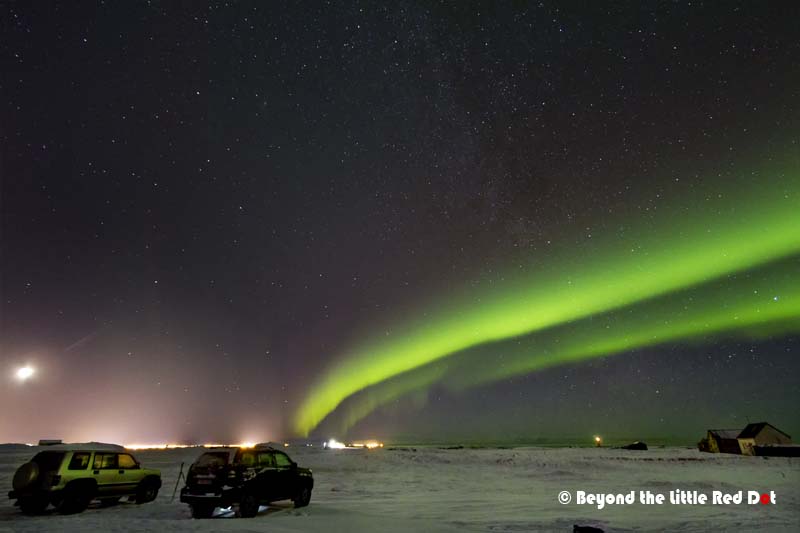
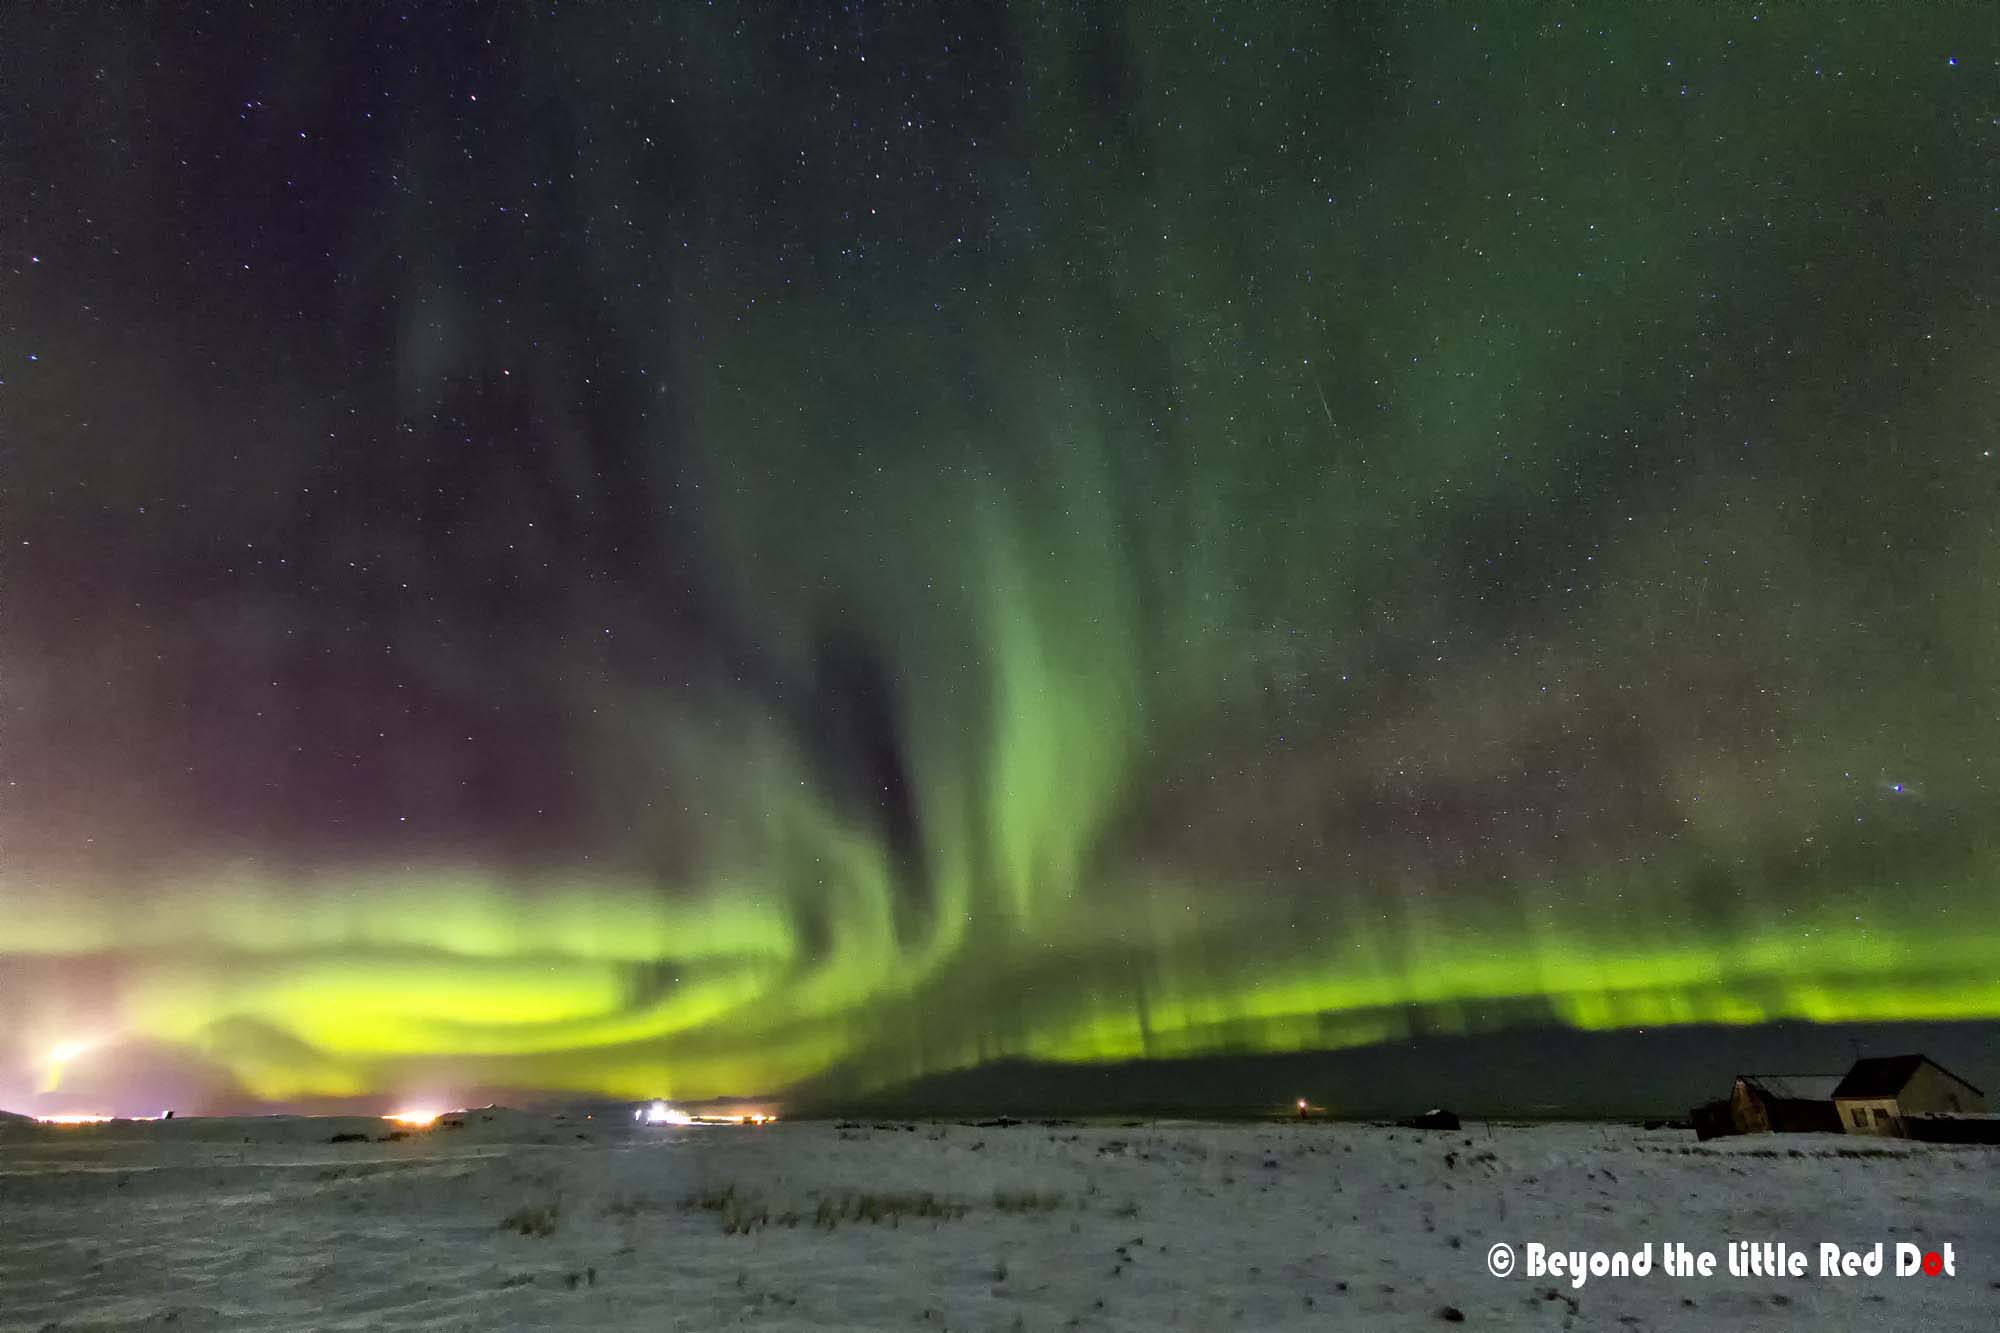
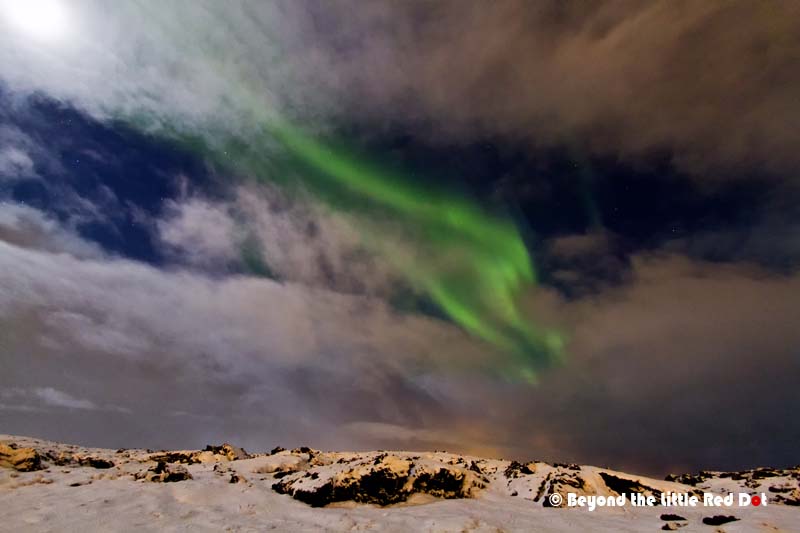
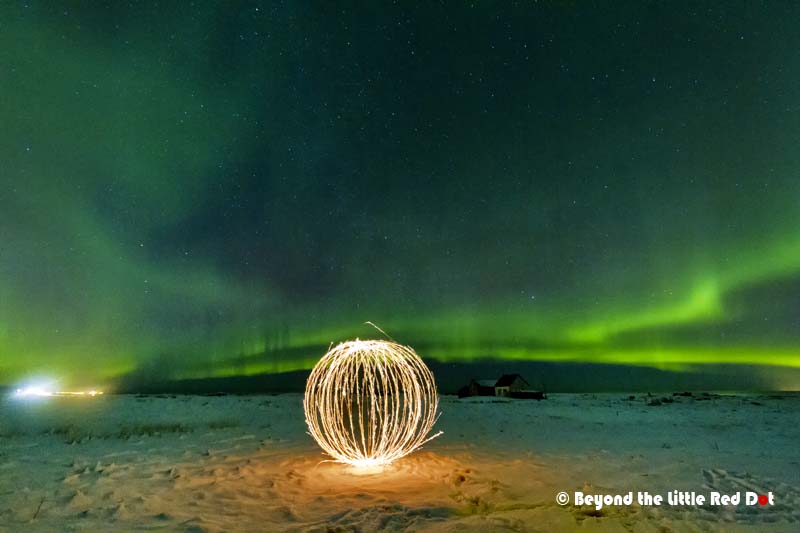
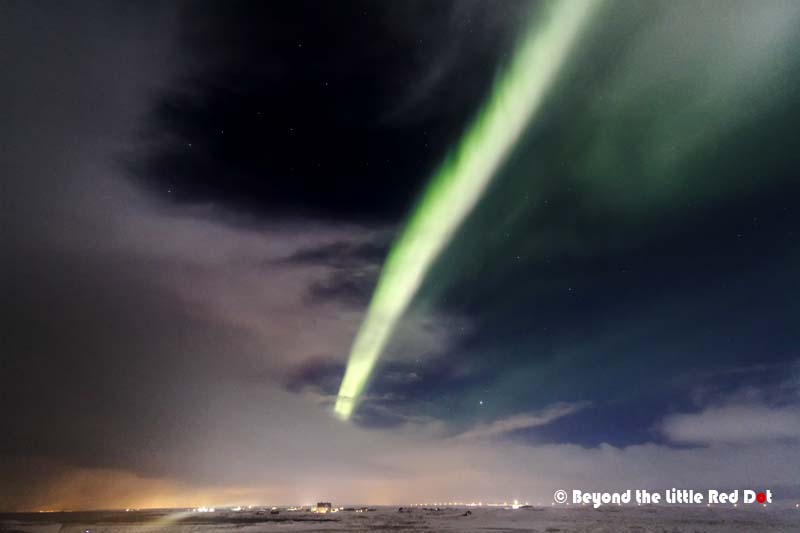
The Aurora Borealis is elusive and several factors have to come together in order to see them. Firstly, there must be solar activity, like solar flares or bursts. Secondly, the weather must be clear. Cloud cover can block out the view even if there is going to be a light show that night. The Aurora happens at least 60 miles up in the sky which is way above most clouds. And of cause, you have to find somewhere dark and away from city lights. To help everyone in getting a good chance to see the Northern Lights, the Iceland Meteorology Department has a website where you can check the strength of the Aurora and cloud cover. This is a helpful tool if you want to find out the best time and place to view the Aurora. The strength of the Aurora is measured on a scale of 0-9. Most of the time, it’s 3-4 for an average display like what you see in my photos above. At times it can go to 5-6 for a strong display, but it doesn’t mean that it will definitely appear. There were nights when the forecast predicted a 5 and nothing appeared to our disappointment. On our last night, the forecast was level 3, but the Aurora that appeared was much brighter and intense, and we were treated to a brief but brilliant display of multi-coloured lights dancing in the sky, just like what we’ve seen in the movies. So you’ll never know.
In order to increase your chances of catching the Northern Lights, it’s recommended to spend at least a week in Iceland. That way, the opportunities for clear skies and solar activity to come together increase and there should be one night where you will see something. And if you don’t get to catch the Northern Lights, you still get to enjoy Iceland’s incredible out-of-this-world scenery. Treat the Northern Lights as the icing on the cake instead of being the main course, and you won’t be disappointed. You can check out Iceland’s other attractions in my other blogs: Reykjavik and Blue Lagoon, the Golden Circle Tour, and Snæfellsnes Peninsular and South Coast.
Should I DIY or Ask For Help?
I feel that this is one activity that you should get someone who is familiar with the Icelandic weather and terrain to help you. But if you are already self driving and touring the more remote areas of Iceland where there is little light pollution, then chances of seeing the Northern Lights are better. You just have to refer to the Meteorology website, hope for clear weather, and wait for them to appear. For the rest of us who prefer to let the locals lead the way since they know best what happens in their backyard, there are several options.
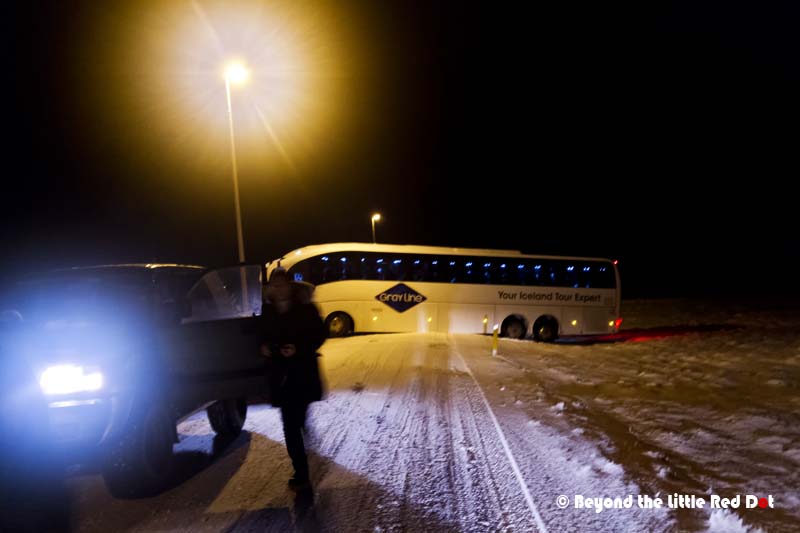
- Firstly, the bus companies like Grayline and Reykjavik Excursions organizes nightly excursions to catch the Northern Lights.
- Secondly, the cruise companies like Elding and Special Tours organizes nightly Northern Lights cruises.
- Thirdly, private tour operators who organize specialty tours to photograph the Northern Lights.
If you just want a chance to see the Northern Lights and are not fussy about getting good photos, then the first and second options are great. They are cheaper, but you do end up with a large group of people who get in the way of your selfies. We did try the night cruises but didn’t get to see anything. The problem I find is that they are restricted to the waters near Reykjavik and Videy Island, and if the clouds are covering that area, your chances of seeing any Aurora are low, since the cruises don’t move further out of the bay. For the bus companies, they are able to travel further on the roads to areas where there are reported sightings of the Aurora.
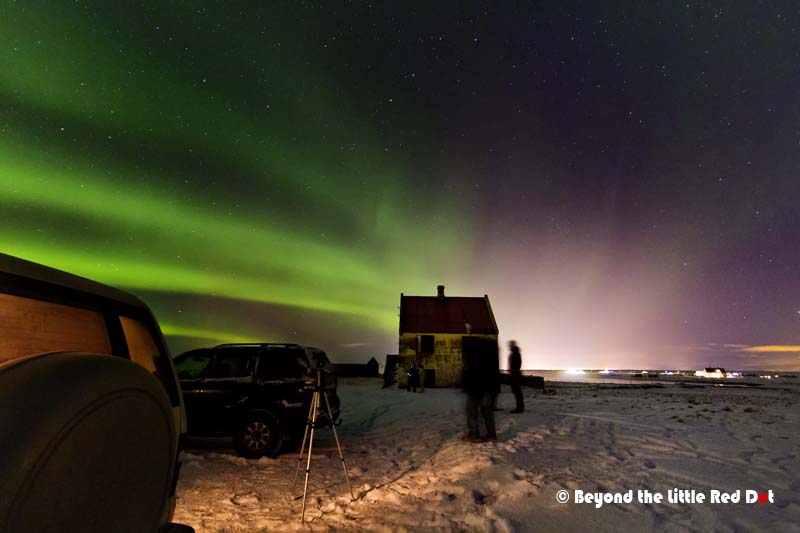
For ourselves, we decided to go with a private tour that specializes in photography. This is run by a group of very friendly photographers who are very willing to help their guests get the best Aurora photos and memories. Their website can be found here. Their prices are higher compared to the larger organized tours but they provide a more personalized service. The group size is small at around 8-12 people and they picked and dropped us off at our apartment. Transport is by SUV’s which are able to go off-road into more remote places. They also helped those guests who didn’t know how to setup their cameras, and provided tripods for rent, plus we had some refreshments like hot cocoa with liquor in it to ward off the cold. For those who didn’t have proper cameras, they also took photos with their professional cameras and emailed the photos. The photography groups also contact each other when one of them finds a spot where the Aurora can be seen, and this greatly increases your chances of seeing the Northern Lights.
How Do I Photograph the Northern Lights?
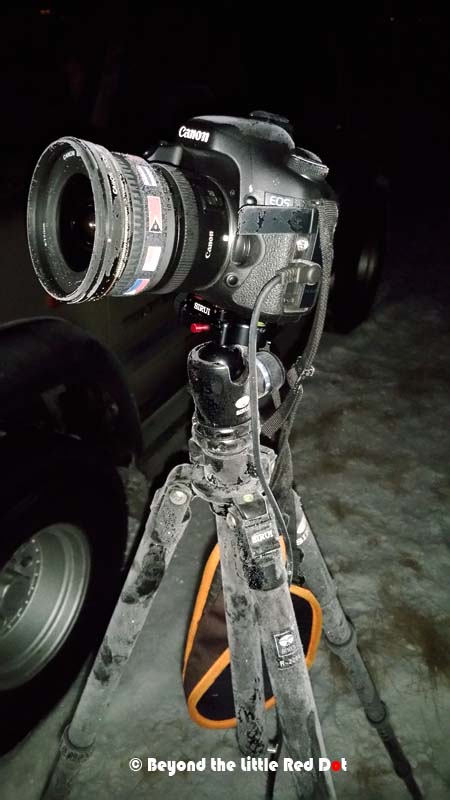
So you are inspired and you want to take some award worthy photos of the Northern Lights, then a decent compact camera or DSLR is a must, along with a tripod. Forget about your iPhones and Galaxies. Smartphones just don’t have the sensitivity to capture the Aurora. If you have tried using your smartphone to take photos in the dark, you would know what I mean. For compact cameras, they must have at least a manual mode where you can set the camera’s ISO, aperture and exposure time manually. This is usually ‘M’ mode on the dial or selection screen. For those who have DSLR’s but are always using the Automatic or Program modes, it’s time to learn how to use the more advanced features of your camera. It also helps if you have a wide angle lens as you want to capture as much of the sky as possible. Lenses with focal lengths from 10-24mm are ideal, although 35mm is also good enough. Lenses with 50mm and above are ok, but you will capture less of the sky.
Here are some basic steps (idiot’s guide) to get a good Aurora photo, assuming that you have already found a good dark spot and the Aurora is already happening.
- Setup your camera on the tripod, make sure it’s steady and won’t topple over due to wind, or uneven ground. Most tripods have a hook on the central column and you can hang a heavy bag to steady the tripod.
- Aim your camera at the sky where most of the Aurora is happening. Usually, this is towards the north.
- Set your lens to the widest focal length. Smaller numbers means wider. Eg. 10mm is wider than 24mm. You want to capture as much of the sky as possible. For most zoom lenses, the widest focal length also corresponds with the largest aperture setting which is important, so read on.
- Set your camera to Manual mode. Turn the dial to ‘M’ or select it in on the screen.
- Focus your camera at a distant object. If your lens or camera has a manual focus button, use it, and set the focus to infinity (It appears as ∞ on the lens). It will be very dark and your camera’s autofocus most probably won’t work, so try focusing at some distant bright object like the moon, city lights, lamp post, or stars if possible. You can also get someone to stand 20-30m away with a flashlight and focus on him. Lock the focus so that it doesn’t refocus when you take the photo.
- Look for the ISO setting. Set it to as high as possible. You are looking for ISO1600 and upwards. If your camera only goes up to ISO800, then use it.
- Now set the Aperture. You should see something like F4.5, F5.6, etc. Set it to as low as possible. The smaller the number, the bigger your aperture, and more light can enter the camera. For most zoom lenses, the largest aperture can only be used at the widest focal length.
- Now set the shutter speed. We are looking at shutter speeds of 1 second to 30 seconds. If your camera is showing fractions like 1/100 then this means the shutter speed is 100th of a second, which is too fast. Select full numbers like 1″, 5″, 10″ or as high as your camera can go. That will be the shutter speed in seconds. Since you can’t hand hold your camera steady for that long, a tripod is an absolute must have.
- Look into the camera viewfinder or live view screen. By changing the exposure time, the camera’s light meter in the view finder will show you whether the picture is going to be over or under exposed. On live view screens, it will show you an approximation of what the photo will look like.
- Once you are satisfied, press the shutter slowly and wait for the photo to be taken. Try to avoid shaking the camera while you press the shutter.
- Look at the taken photo and admire your handiwork. But usually, the first photo is junk. Based on the exposure time your photo will be either too dark or too bright. If it’s too dark, then lengthen the exposure time. If it’s too bright then shorten the exposure time. If it’s blurred, check that your focus is not out, or if you are not shaking the camera while you take the picture. Some trial and error will get you a final well exposed photo.
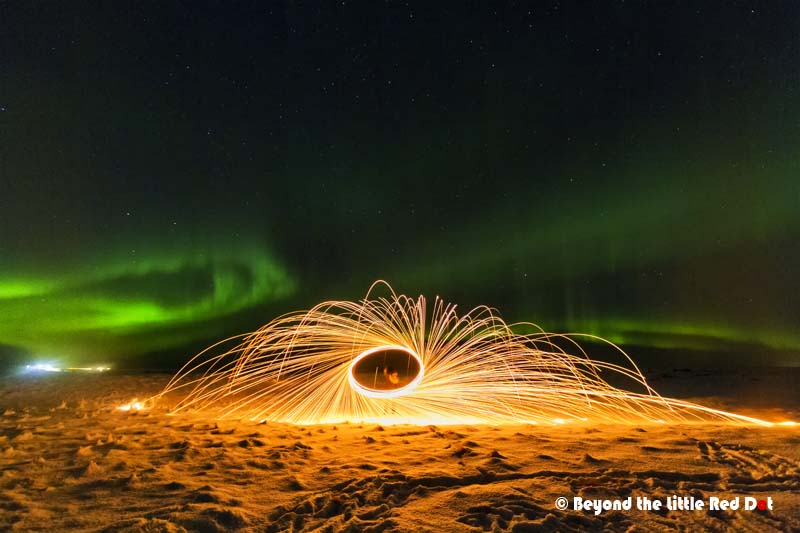
- For a well composed photo, it would be nice to include some interesting foreground subjects, like a building, car, mountains, or trees that give some sense of perspective to the photo. A pond or lake which shows some reflection of the Aurora is a really good subject. As you are taking a long exposure, make sure the subject doesn’t move when you take the photo. Although moving subjects can also make the photo interesting, like the photos of the burning steel wool above, or light painting can also be an interesting shot.
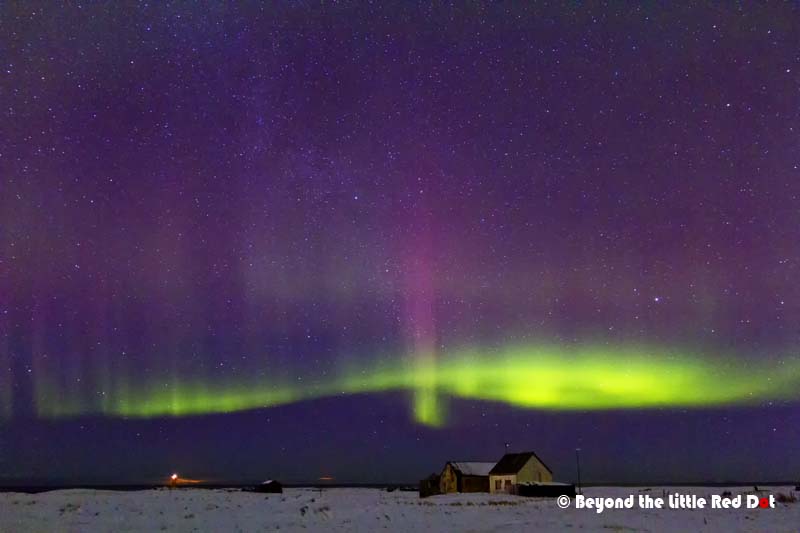
For reference, my photos of the Aurora were taken with ISO1600, F3.5 and shutter speeds of between 4 to 20 seconds. In some cases, you may not be able to see the Northern Lights with your naked eyes, but it does show up on the camera. This is especially if the Aurora is a level 1-2 display.
For more advanced camera users, there are a few other things that you might want to experiment with.
- ISO setting. I mentioned before to set it as high as possible, but the higher you set it, the noisier (grainier) the photos looks. This depends on the camera and the newer (more expensive) DSLR’s are able to take photos with ISO of up to 6400 with little noise. So you need to find which ISO setting is optimal to give you a clear photo.
- Shutter speed. Although it’s possible to set the shutter speed to as long as possible. 30 seconds would be the limit for a 10mm lens before the stars start to look like streaks due to the movement of the Earth, unless you are trying to add star trails as an effect in the picture. The longer the focal length, the shorter the shutter speed must be to maintain stars as points of light.
- Shoot in RAW format instead of JPEG if your camera allows this. All DSLR’s have this feature, but compact camera’s may not have it. RAW format is like a digital negative and preserves what the camera sensor actually sees. JPEG format involves digital compression of the photo data and a lot of data is removed. Because of this, JPEG photos are smaller in size, but retain less of the photo’s information. RAW files are several times larger than JPEG and cannot be viewed by normal software programs, so you can’t just post the RAW photos onto your Facebook and show your friends the incredible Aurora that you just saw. They need to be processed through photo editing software like Photoshop. So only do this if you are comfortable in using photo editing software. The advantages of editing the RAW image is that you can adjust the exposure, contrast, colours and remove noise from the image to give you a much better looking final photo.
- To avoid shaking the camera when you press the shutter (and ending with a blurred photo), there is a timer delay setting. Usually this is the 10 seconds self timer on compact cameras. On DSLR’s there is usually a 2 seconds timer delay setting. So after you press the shutter, there is a 2 second delay before the camera takes the photo. Otherwise, you can use a cable release or infrared remote control to activate the camera if you have one.
Some Practical Advice Before You Head Out
As Aurora viewing is usually done during winter months, it’s going to be very cold out there. Make sure you are well dressed for sub-zero temperatures and protected against wind chill. It can get windy and colder than usual in the remote areas.
Bring extra camera batteries (fully charged). Batteries tend to have shorter lifespans in very cold weather and can suddenly ‘die’ without warning, and you don’t want to end up with a dead camera halfway. I read that some people buy those chemical hand warmers and secure their spare batteries to it by rubber bands, and leave it in their coat pockets to keep them warm.
Some cameras or memory cards may not work in extremely cold temperatures, so you may need to bring a backup camera and memory cards if you really want to get some photos. Memory cards with ‘Extreme’ rating are good for the cold weather. Most DSLR’s work in the cold weather but some point and shoot cameras may freeze up.
It’s also going to be very dark, so bring a flashlight along to see your way and help in setting up your camera.
Wear gloves that are easily removable or half gloves. You need to adjust your camera’s settings and trying to operate small buttons and dials with thick gloves on is quite difficult.
Our photography guides also advised us to remove any UV filter in front of the lens, as some of the UV filters can cause interference rings to appear in photos of the Northern Lights.
For those who are more adventurous, try doing a timelapse of the Northern Lights which is really something magical to see. So if you are going to chase the Northern Lights, I hope this blog is helpful and happy hunting.

You’ve definitely captures the magic here, and enjoyed reading about how you addressed the scene behind these mystical and elusive lights in the sky, something I think anyone who has ever heard of the Northern Lights wishes to see. I hope someday to see and experience them, even if they are less than expectations. And yes, lucky you to have found a creative group of photographers 🙂 Great steel wool photos!!!
Yes, slight disappointment but then just thinking that I finally got to see them is good enough to erase any lingering disappointment. I would say it’s a really magical sight.
I live in Finland but I’ve never managed to see the Northern Lights. It’s definitely on my bucket list, though! Loved this post! 🙂
The Northern Lights can also be seen over Ireland a couple of times a year, although I have never been lucky enough to witness them first hand!